Making My Tasks web part available outside of MySites

The My Tasks web part exists in MySites by default, and can be found under the Content Rollup category. To make this web part available outside of MySites, activate the “My Tasks Dashboard” feature.

This is a hidden Web-scoped feature. The feature ID is 89D1184C-8191-4303-A430-7A24291531C9, and the feature folder under SharePointRoot is MyTasksDashboard.

Posted in SharePoint 2013, Social | 9 Comments

Newsfeed in SharePoint 2013 – What can you expect?

While there are lots of high level information out there about what you can expect with the Newsfeed in SP2013, I have not been able to find a list of the types of updates you can expect to see on the Newsfeed. After a couple of days of experimenting, my findings are as below.

Many thanks to @tbasrai for helping me out with the investigation.

Following a person

Your Newsfeed will show when the person you have followed does one of the following:

  1. Posts a new microblog message or replies to a microblog conversation
  2. Posts a new topic in a discussion forum or replies to a topic
  3. Likes a discussion forum topic or reply
  4. Gains a new reputation
  5. Follows another person
  6. Follows a document
  7. Follows a site

Your Newsfeed will NOT show when the person you have followed does one of the followings:

  1. Creates, updates or deletes a document
  2. Updates their Ask Me About or Mobile Phone
  3. Follows a tag
  4. Is @mentioned by someone else
  5. Likes a microblog message

Following a #tag

Your Newsfeed will show when the #tag you have followed is:

  1. Used in a microblog message or a reply to a conversation
  2. Used in a discussion forum topic or reply to a topic (in Body field only)

Your Newsfeed will NOT show when the #tag you have followed is:

  1. Used to tag a document, page or list using the Tags and Notes button on the ribbon – (This is the biggest shortcoming for me!!)

Following a site

Following a site allows you to post microblog messages to that site’s “local” Newsfeed. You can select the site to post microblog messages to as seen below:

1. Share with

The site’s Newsfeed is explained in more details here: http://radutut.wordpress.com/2013/02/01/following-sites-in-sharepoint-2013/

Below are my findings of what happens when you have followed a site:

  1. If you selected to post to that site’s Newsfeed, your microblog messages will appear on that site’s “local” Newsfeed
  2. Microblog messages posted to that site’s “local” Newsfeed will appear on your MySite’s Newsfeed
  3. If a microblog message is posted to that site’s “local” Newsfeed, and you have NOT followed that site, and the message IS tagged with a #tag that you have followed, then the message will NOT appear on your MySite’s Newsfeed.
  4. If a microblog message is posted to that site’s “local” Newsfeed, and you have NOT followed that site, and the message @mentioned you, then the message WILL appear on your MySite’s Newsfeed.
  5. You cannot @mention a site that you followed. This means you cannot post to multiple sites at once.
  6. If you have followed a site, but the site does not have the Site Feed feature activated, then you will not have the option to post a microblog message to that site. The option will simply not appear on the list.

Following a document

Your Newsfeed will show when the document you have followed is:

  1. Updated

Your Newsfeed will NOT show when the document you have followed is:

  1. Deleted
  2. Tagged using Tags and Notes

@Mention

Your Newsfeed will show when you are @mentioned in these scenarios:

  1. @mentioned in a microblog message or reply to a conversation. Clicking View Conversation in the Newsfeed works fine.
  2. @mentioned in a discussion forum topic or reply to a topic. Clicking View Conversation in the Newsfeed resulted in an error for me (thread has been deleted or something similar).

Discussion forum

Replies to your discussion topics are NOT shown on your Newsfeed. However, in the Newsfeed settings section of your profile, you can elect to be notified by emails when replies are posted to your topics.

Posted in SharePoint 2013, Social, Uncategorized | 3 Comments

Making the Newsfeed web part available outside of My Sites in SharePoint 2013

The Newsfeed is a key piece in SP2013’s approach to social computing. It appears on the landing page of My Site as below:

Newsfeed

This is actually a web part titled Newsfeed, and can be found under the Social Collaboration category. Now, you may want to have the Newsfeed on the homepage of your main portal rather than My Site. To make this web part available in your site collection, you will need to activate the feature with title “My Site Layouts Feature“. This is a hidden site collection feature so you will need to use SharePoint Manager or PowerShell. The feature ID is 6928B0E5-5707-46a1-AE16-D6E52522D52B. Its physical location under {SharePointRoot} is TEMPLATE\FEATURES\MySiteLayouts.

This feature brings a number of other web parts and also the MySite.master master page. Check its manifest for further details.

Posted in MySite, SharePoint, SharePoint 2013, Social | 46 Comments

Unknown server tag ‘asp:ListView’ in SharePoint 2010

Trying to use the ListView control in SharePoint 2010 and you’ll probably get the error above. Googling and you’ll find that most people suggest adding the tag below to the web.config:

<%@ Register Tagprefix="asp" Namespace="System.Web.UI.WebControls" Assembly="System.Web.Extensions, Version=3.5.0.0, Culture=neutral, PublicKeyToken=31bf3856ad364e35" %>

While this indeed fixes the problem, you’ll have to either manually change the web.config of your SharePoint server – which IMO is a bad idea, or write some code to deploy the web.config change.

My prefer fix is to just add the tag to the page that is using the control instead. In an application page or a visual web part’s user control, you will find that there is already an ‘asp’ tag prefix registered. It however points to the System.Web.UI namespace. The ListView controls sits under the System.Web.UI.WebControls namespace – hence the problem. Just add another ‘asp’ tag as above to the page/user control and you will be fine.

Posted in SharePoint | Leave a comment

Can’t create new Office Web Apps farm: The server must be joined to a domain

I kept on getting the above error message when executing New-OfficeWebAppsFarm even though my Office Web Apps (OWA) server is joined to a domain.

My setup is like this: Server A has SP2013 installed on the physical machine, and hosts a virtual domain controller. Server B has OWA 2013 installed on the physical machine. Server A and Server B is connected using a crossover network cable.

The problem turned out to be the network settings on my Server B where OWA is installed. In the IPv4 settings, I specified a static IP for the server but did not specify a preferred DNS server IP. I set the DNS server IP to be the IP of the domain controller (virtual on Server A) and was then able to create a new farm!

This KB article helped me to solve this issue.

Posted in Office Web Apps | 1 Comment

Keyboard shortcut for “Focus on Content” button in SharePoint 2013

In SharePoint 2013 the Focus on Content button is found in the upper right corner, just under the help button. This button hides/shows the left navigation, top navigation and title bars – giving you more screen real estate for the main content when needed.

It is not obvious, but the keyboard shortcut for this button is Alt + F11. An easy way to remember this is that F11 is the keyboard shortcut for full-screen mode in most browsers (in IE and Chrome at least).

Posted in SharePoint | 2 Comments

How to use SharePoint 2013’s AppFabric caching in your code

By default SharePoint 2013 installs an AppFabric cache host on all servers in the farm. These hosts form a cache cluster for the farm.

In SP2010 if you were running a multi-WFEs farm and using in-process caching, your users will randomly see difference data – because they are randomly being taken to difference WFEs, and each WFE maintains a different local in-process cache. If you enable server-affinity, then a given user will always see the same data. However, he/she may not see the same data as another user. AppFabric caching in SP2013 should solve that problem.

Wictor Wilen has an article that describes how to use the AppFabric caching API in SP2010. The AppFabric API itself remains unchanged between SP2010 and SP2013. However, since AppFabric caching is now an integral part of SP2013, we can streamline the code to work better within the SharePoint context. For example, SharePoint can tell us all the available host endpoints.

The CacheManager class below allows you to access the default cache created by SharePoint (as an instance of the DataCache class).

The SPDistributedCacheClusterInfoManager and SPDistributedCacheClusterInfo classes are used to retrieve all the cache host endpoints. These classes are in the Microsoft.SharePoint.DistributedCaching.Utilities namespace. Review the in-code comments.

public sealed class CacheManager
    {
        private static readonly object _lock = new object();
        private static DataCache _defaultCache;

        private CacheManager() {}

        public static DataCache DefaultCache
        {
            get
            {
                using (SPMonitoredScope scope = new SPMonitoredScope("CacheManager.DefaultCache"))
                {
                    lock (_lock)
                    {
                        if (_defaultCache == null)
                        {
                            //By default the farm ID is appended to the name of the cluster and caches
                            //created by SharePoint.
                            var farmID = SPFarm.Local.Id;

                            //This is one of the caches created by SharePoint. Run the AppFabric's
                            //Get-Cache PowerShell to see a list of caches created by SharePoint.
                            var defaultCacheName = "DistributedDefaultCache_" + farmID;

                            var factoryConfiguration = new DataCacheFactoryConfiguration()
                            {
                                Servers = GetAllDataCacheServerEndpointsForFarm(farmID)
                            };

                            _defaultCache = new DataCacheFactory(factoryConfiguration).GetCache(defaultCacheName);
                        }
                        return _defaultCache;
                    }
                }
            }
        }

        private static List<DataCacheServerEndpoint> GetAllDataCacheServerEndpointsForFarm(Guid farmID)
        {
            var endpoints = new List<DataCacheServerEndpoint>();

            //By default this is the name of the cluster created by SharePoint.
            string cacheClusterName = "SPDistributedCacheCluster_" + farmID;

            var cacheClusterManager = SPDistributedCacheClusterInfoManager.Local;
            var cacheClusterInfo = cacheClusterManager.GetSPDistributedCacheClusterInfo(cacheClusterName);

            foreach (var cacheHost in cacheClusterInfo.CacheHostsInfoCollection)
            {
                endpoints.Add(new DataCacheServerEndpoint(cacheHost.HostName, cacheHost.CachePort));
            }
            return endpoints;
        }
    }

Once you have a reference to an instance of DataCache, you can use the normal AppFabric caching API to insert and retrieve items from the cache. Refer to Wictor’s article above for some examples.

Posted in AppFabric, SharePoint | 7 Comments

Posting blog comments as original author of blog post in SharePoint 2010

I had a requirement for a feature that would enable admin users to post comments to blog entries that would appear as if they were posted by the original author of the blog article. The scenario here is a corporate intranet. The CEO would post a blog article that can be read and commented on by all employees. The CEO is very busy and delegates the job of replying to comments to her staff. For relationship purposes however, the replies should appear as if they were posted by the CEO herself.

This poses as an interesting problem and this post describes my solution to this requirement. The goal is to make this work with SharePoint’s OOTB blog feature and use as little customisation as possible.

User Experience

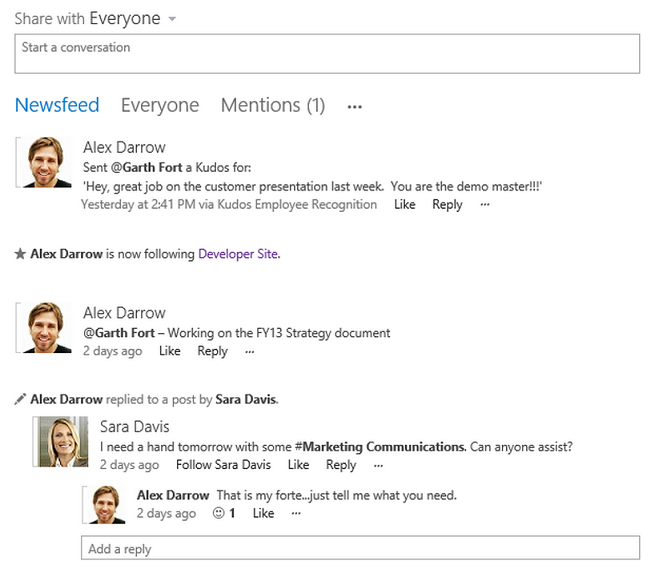
All users would use the standard OOTB UIs to post blog comments. If the user has appropriate permissions (e.g. member of the site’s Owner group), he would get an additional button to post the comment as the original author of the blog post, as shown belown.

If the user does not have the required permissions, he would not see this special button, and everything will appear as they do OOTB.

Approach

This solution involves 3 elements:

  • A special button that inherits from the OOTB “Submit Comment” button. In the OnLoad event, this custom button checks the permissions of the current user. The button hides itself if the user does not have the required permissions. The button also overrides the SaveItem method to add a flag indicating that the Comment item should be saved as being posted by the original author of the blog post.
  • A custom rendering template to add our special button to the form that is used to post Comments
  • An event receiver attached to the Comments list that handles the ItemAdded event. This event receiver checks for the flag that is raised by our special button. If found, it updates the Comment item and set the Author field to be the original author of the blog post.

Below is a walkthrough of these elements. You can download the code at the end of this post.

1. Custom submit button

The OOTB “Submit Comment” button is actually a special class in SharePoint, namely the SubmitCommentButton class. We will create a custom button inherited from this class and override some of its methods.

In your Visual Studio project (which needs to be a Farm solution), add a new class (mine is called SubmitCommentAsAuthorButton). Make this class public and inherits from the SubmitCommentButton class, which is defined in Microsoft.SharePoint.dll.

First, we’ll override the OnLoad method to ensure that the button is only visible to users with appropriate permissions.

protected override void OnLoad(EventArgs e)
{
	if (!Page.IsPostBack)
	{
		if (!DoesCurrentUserHaveRequiredPermissions())
		{
			this.Visible = false;
			return;
		}
	}
	base.OnLoad(e);
}

private bool DoesCurrentUserHaveRequiredPermissions()
{
	var ownerGroup = SPContext.Current.Web.AssociatedOwnerGroup;
	return ownerGroup.ContainsCurrentUser;
}

Next, we’ll override the SaveItem method. Here we simply add a flag indicating that the Comment item should be updated to appear as being posted by the original author of the blog post. Review the in-code comment below.

protected override bool SaveItem()
{
	//Raise our special flag in the Properties bag of the current Comment item. Our
	//event receiver attached to the Comments list will look for this flag.
	this.ItemContext.ListItem.Properties[Constants.IsPostingAsAuthorPropertyKey] = true;

	return base.SaveItem();
}

Add the supporting Constants class:

class Constants
{
	public const string IsPostingAsAuthorPropertyKey = "IsPostingAsAuthor";
	public const string ParentBlogPostIDFieldName = "Post Id";
	public const string ParentBlogListRelativeUrl = "Lists/Posts";
}

2. Custom rendering template

Next we need to make our custom submit button appears on the form that is used to post comments. This form is controlled by a rendering template, namely BlogCommentsForm. This template is defined in the DefaultTemplates.ascx file, located at {SharePointRoot}\TEMPLATE\CONTROLTEMPLATES.

SharePoint allows us to override these rendering templates. We do this by deploying a custom ASCX file (to the same folder above) containing a rendering template with the same ID as the one we want to override.

In your Visual Studio project, created a mapped folder to CONTROLTEMPLATES. Add an ASCX file to the mapped CONTROLTEMPLATES folder. Mine is called BNH.SharePoint.BlogCommentAsAuthor.ascx. Note that this ASCX file must sit directly in the CONTROLTEMPLATES folder, and not in a sub-folder underneath this folder. Your project should now look like this:

Add the following directives to the ASCX (these are copied from the OOTB DefaultTemplates.ascx):

<%@ Control Language="C#"   AutoEventWireup="false" %>
<%@ Assembly Name="Microsoft.SharePoint, Version=14.0.0.0, Culture=neutral, PublicKeyToken=71e9bce111e9429c" %>
<%@ Register TagPrefix="SharePoint" Assembly="Microsoft.SharePoint, Version=14.0.0.0, Culture=neutral, PublicKeyToken=71e9bce111e9429c" namespace="Microsoft.SharePoint.WebControls"%>
<%@ Register TagPrefix="wssuc" TagName="ToolBar" src="~/_controltemplates/ToolBar.ascx" %>

Add one more directive, this is for our custom button (replace the assembly’s full name with your own):

<%@ Register TagPrefix="BNH" Assembly="BNH.SharePoint.BlogCommentAsAuthor, Version=1.0.0.0, Culture=neutral, PublicKeyToken=70cbde78fe619ed5" namespace="BNH.SharePoint.BlogCommentAsAuthor"%>

Copy the BlogCommentsForm rendering template from the OOTB DefaultTemplates.ascx and add it to our custom template:

<SharePoint:RenderingTemplate id="BlogCommentsForm" runat="server">
	<Template>
		<table width="275" cellpadding="0" cellspacing="0" border="0">
				<tr><td><h3 class="ms-CommentHeader"><asp:Label id="BlogCommentsFormTitle" runat="server" Visible="true" Text="<%$Resources:wss,comments_AddComment%>"/></h3></td></tr>
		<tr><td>
		<span id='part1' style="padding-top: 10px">
			<SharePoint:InformationBar ID="InformationBar1" runat="server"/>
			<table class="ms-formtable" border="0" cellpadding="0" cellspacing="0" width="100%">
			<SharePoint:ChangeContentType ID="ChangeContentType1" runat="server"/>
			<SharePoint:FolderFormFields ID="FolderFormFields1" runat="server"/>
			<SharePoint:ListFieldIterator ID="ListFieldIterator1" runat="server" ExcludeFields="PostTitle"/>
			<SharePoint:ApprovalStatus ID="ApprovalStatus1" runat="server"/>
			<SharePoint:FormComponent ID="FormComponent1" TemplateName="AttachmentRows" runat="server"/>
			</table>
			<table cellpadding="0" cellspacing="0" width="100%" style="padding-top: 10px"><tr><td width="100%">
			<wssuc:ToolBar CssClass="ms-formtoolbar" id="toolBarTbl" RightButtonSeparator="&amp;#160;" runat="server">
					<Template_RightButtons>
						<SharePoint:SubmitCommentButton ID="SubmitCommentButton1" CssClass="ms-ButtonHeightWidth2" runat="server" Text="<%$Resources:wss,tb_submitcomment%>"/>
					</Template_RightButtons>
			</wssuc:ToolBar>
			<SharePoint:InitContentType ID="InitContentType1" runat="server"/>
			<SharePoint:ItemHiddenVersion ID="ItemHiddenVersion1" runat="server"/>
			</td></tr></table>
		</span>
		</td></tr></table>
		<SharePoint:AttachmentUpload ID="AttachmentUpload1" runat="server"/>
	</Template>
</SharePoint:RenderingTemplate>

Now add our custom button to the BlogCommentsForm template in our custom ASCX. Add the code below just above the OOTB submit button (search for SubmitCommentButton):

<BNH:SubmitCommentAsAuthorButton CssClass="ms-ButtonHeightWidth2" runat="server" Text="Submit Comment as Post Author"/>

The complete custom ASCX should look like this:

<%@ Control Language="C#"   AutoEventWireup="false" %>
<%@ Assembly Name="Microsoft.SharePoint, Version=14.0.0.0, Culture=neutral, PublicKeyToken=71e9bce111e9429c" %>
<%@ Register TagPrefix="SharePoint" Assembly="Microsoft.SharePoint, Version=14.0.0.0, Culture=neutral, PublicKeyToken=71e9bce111e9429c" namespace="Microsoft.SharePoint.WebControls"%>
<%@ Register TagPrefix="wssuc" TagName="ToolBar" src="~/_controltemplates/ToolBar.ascx" %>
<%@ Register TagPrefix="BNH" Assembly="BNH.SharePoint.BlogCommentAsAuthor, Version=1.0.0.0, Culture=neutral, PublicKeyToken=70cbde78fe619ed5" namespace="BNH.SharePoint.BlogCommentAsAuthor"%>

<SharePoint:RenderingTemplate id="BlogCommentsForm" runat="server">
	<Template>
		<table width="275" cellpadding="0" cellspacing="0" border="0">
				<tr><td><h3 class="ms-CommentHeader"><asp:Label id="BlogCommentsFormTitle" runat="server" Visible="true" Text="<%$Resources:wss,comments_AddComment%>"/></h3></td></tr>
		<tr><td>
		<span id='part1' style="padding-top: 10px">
			<SharePoint:InformationBar ID="InformationBar1" runat="server"/>
			<table class="ms-formtable" border="0" cellpadding="0" cellspacing="0" width="100%">
			<SharePoint:ChangeContentType ID="ChangeContentType1" runat="server"/>
			<SharePoint:FolderFormFields ID="FolderFormFields1" runat="server"/>
			<SharePoint:ListFieldIterator ID="ListFieldIterator1" runat="server" ExcludeFields="PostTitle"/>
			<SharePoint:ApprovalStatus ID="ApprovalStatus1" runat="server"/>
			<SharePoint:FormComponent ID="FormComponent1" TemplateName="AttachmentRows" runat="server"/>
			</table>
			<table cellpadding="0" cellspacing="0" width="100%" style="padding-top: 10px"><tr><td width="100%">
			<wssuc:ToolBar CssClass="ms-formtoolbar" id="toolBarTbl" RightButtonSeparator="&amp;#160;" runat="server">
					<Template_RightButtons>
						<BNH:SubmitCommentAsAuthorButton CssClass="ms-ButtonHeightWidth2" runat="server" Text="Submit Comment as Post Author"/>
						<SharePoint:SubmitCommentButton ID="SubmitCommentButton1" CssClass="ms-ButtonHeightWidth2" runat="server" Text="<%$Resources:wss,tb_submitcomment%>"/>
					</Template_RightButtons>
			</wssuc:ToolBar>
			<SharePoint:InitContentType ID="InitContentType1" runat="server"/>
			<SharePoint:ItemHiddenVersion ID="ItemHiddenVersion1" runat="server"/>
			</td></tr></table>
		</span>
		</td></tr></table>
		<SharePoint:AttachmentUpload ID="AttachmentUpload1" runat="server"/>
	</Template>
</SharePoint:RenderingTemplate>

3. Event receiver

In your Visual Studio project add a feature (mine is called BlogCommentAsAuthor) and set its scope to be Web. Add an Event Receiver project item (mine is called BlogCommentsEventReceiver). The designer will prompt you to select a list and an event type. Select any list (we will fix this up later) and select An item was added (i.e. ItemAdded).

Once the event receiver has been added to your project, edit its Elements.xml. Change the ListTemplateId to be 302 (this is the template ID for the Comments list). Add the following element to the Receiver element:

<Synchronization>Synchronous</Synchronization>

The XML above set the ItemAdded event receiver to be synchronous. This is to ensure that the user will not see the newly added item until our event receiver has finished its job.

The complete XML should appear as below:

<Elements xmlns="http://schemas.microsoft.com/sharepoint/">
	<Receivers ListTemplateId="302">
		<Receiver>
			<Name>BlogCommentsEventReceiverItemAdded</Name>
			<Type>ItemAdded</Type>
			<Assembly>$SharePoint.Project.AssemblyFullName$</Assembly>
			<Class>BNH.SharePoint.BlogCommentAsAuthor.BlogCommentsEventReceiver.BlogCommentsEventReceiver</Class>
			<SequenceNumber>10000</SequenceNumber>
			<Synchronization>Synchronous</Synchronization>
		</Receiver>
	</Receivers>
</Elements>

In the event receiver class, replace the ItemAdded method and add the code below. Review the in-code comments.

public override void ItemAdded(SPItemEventProperties properties)
		{
			if (properties.ListItem != null)
			{
				//Look for our special flag. If we find it, update the Author field to be the same value as the
				//Author field of the parent Blog post.
				if (properties.ListItem.Properties.ContainsKey(Constants.IsPostingAsAuthorPropertyKey))
				{
					var isPostingAsAuthor = Boolean.Parse((string)properties.ListItem.Properties[Constants.IsPostingAsAuthorPropertyKey]);
					if (isPostingAsAuthor)
					{
						var blogPostItem = GetParentBlogPostForCommentItem(properties.ListItem);

						properties.ListItem[SPBuiltInFieldId.Author] = blogPostItem[SPBuiltInFieldId.Author];
						properties.ListItem.Update();
					}
				}
			}
			base.ItemAdded(properties);
		}

		private SPListItem GetParentBlogPostForCommentItem(SPListItem commentListItem)
		{
			//We have to hardcode the URL to the parent Blog list as this info is not contained within the
			//Comment list item. OOTB however, the Blog list can only be created as part of the Blog site template
			//and its URL cannot be changed. This is therefore relatively safe.
			var blogListUrl = commentListItem.Web.ServerRelativeUrl.TrimEnd('/') + "/" + Constants.ParentBlogListRelativeUrl;

			var blogList = commentListItem.Web.GetList(blogListUrl);
			var parentBlogPostIDLookup = new SPFieldLookupValue((string)commentListItem[Constants.ParentBlogPostIDFieldName]);

			return blogList.GetItemById(parentBlogPostIDLookup.LookupId);
		}

That is all! Deploy the solution, perform an IISRESET (this is required for SharePoint to pick up the new rendering template) and activate the feature.

4. Download the source code

You can download the complete Visual Studio solution here.

5. Other posts you may be interested in

Want to improve the user experience in SharePoint? Check out my other custom solutions here.

Posted in Blog, Rendering Template, SharePoint 2010 | Leave a comment

Merge-SPLogFile does not return any record for correlation ID

Given a correlation ID, Merge-SPLogFile is one of the best ways to track down a SharePoint error as this cmdlet searches for this ID across the ULS of all servers in the farm. You can even specify other filtering criteria, such as Start/End time, category, etc.

Today I used this cmdlet on an error ID reported by the user. The cmdlet however did not return any record. I manually searched through the ULS text files on the server and was able to find the error. What’s going on!?

As it turns out, the correlation ID specified to this cmdlet has to be UPPER CASE!! The cmdlet returned records as expected after I changed the casing of the correlation ID.

I guess this was alluded to in TechNet:

Specifies the correlation ID to filter on. The type must be a valid GUID, in the form F0BB0790-4323-A153-096F-ABCDC80E24D4.

But seriously.. who would have thought?!

Posted in PowerShell, SharePoint 2010 | Leave a comment

Cannot login in with FBA with AD LDS in SharePoint 2010: An exception occurred when trying to issue security token: The security token username and password could not be validated..

I was setting up FBA with AD LDS for SP2010. I created some test users in AD LDS and was able to see them in the PeoplePicker and grant them access. I couldn’t login as these users however, and was seeing the below in the ULS:

Request for security token failed with exception: System.ServiceModel.FaultException: The security token username and password could not be validated.

An exception occurred when trying to issue security token: The security token username and password could not be validated..

Turning on Verbose logging for Claims Authentication category and you can see other things, in particular the below, which suggests the STS configuration is OK.

Authenticated with login provider. Validating request security token.

It turns out that the problem is because the AD LDS user account is disabled!! When you create a user in AD LDS, depending on the current AD policy on your computer, the LDS account may be disabled by default! To enable it, edit the account and set the msDS-UserAccountDisabled attribute to FALSE!!

Another issue that could cause login to fail is that the STS does not have access to the AD LDS user store. I have written about this here.

Posted in AD LDS, Form Based Authentication, SharePoint 2010 | 2 Comments