
Currently PowerApps Portal does not support rich text editor out-of-the-box (OOTB). While the backend CRM has an OOTB rich text control that can be used in CRM, this unfortunately currently does not work on Portal.
You can add rich text editor support to PowerApps Portal using a JavaScript library such as CKEditor. While there are a few popular libraries out there, CKEditor is the library that Microsoft uses underneath the hood for their OOTB rich text control in CRM. For this reason, I recommend that you use CKEditor on the Portal to ensure that rich text submitted from the Portal can be viewed seamlessly from the backend CRM and vice versa. This post provides the steps and code to implement CKEditor on the Portal, and to address a few technical issues that I have encountered.
It’s actually fairly easy to implement CKEditor on the Portal (assuming that you want to enable it on multi-lines text fields). There are however two issues that I have encountered:
- Field validation no longer works
- Save Changes Warning on advanced form (aka web form) no longer works
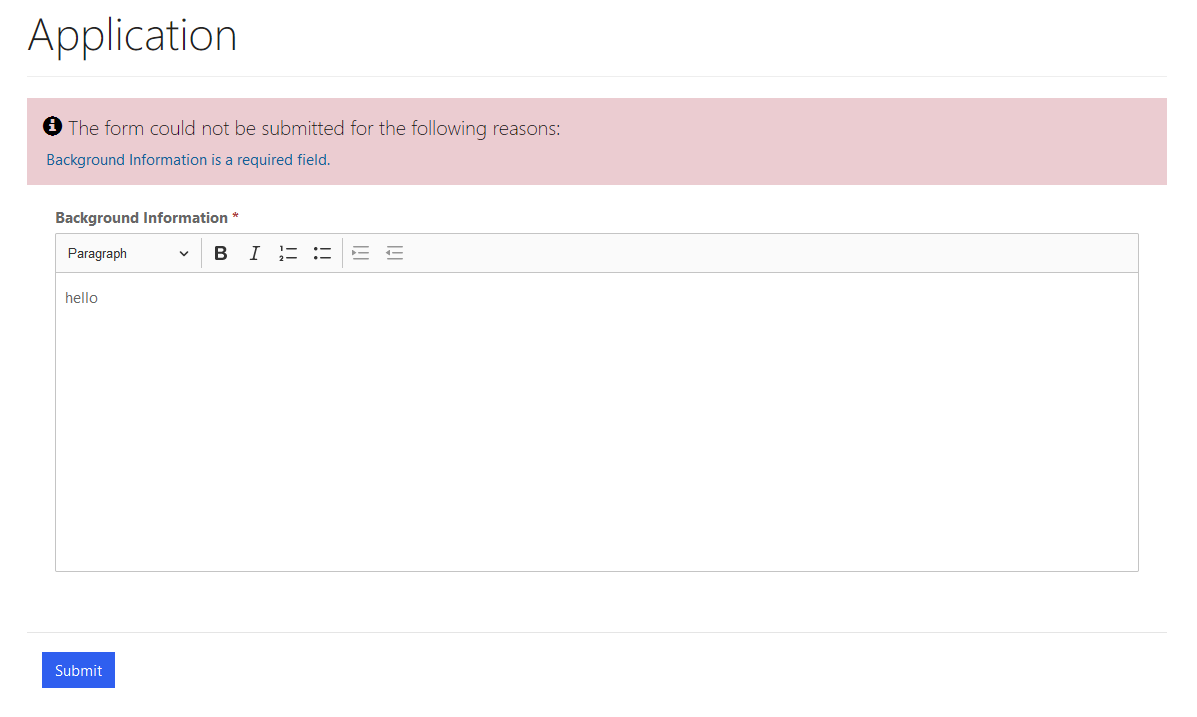
Field validation no longer works
Validation such as mandatory field no longer works properly. In the screenshot below for example, user cannot submit the form due to the mandatory field validation error, even though they have typed a value into the rich text editor for that field.
Save Changes Warning on advanced form no longer works
Advanced form (aka web form in the old terminology) has a feature that can be enabled to warn user about unsaved changes upon leaving the page.

This option no longer works for fields where the rich text editor is enabled. That is, if a user has made a change to a rich text enabled field, then they will not be warned about unsaved changes when they navigate away from the page.
Root cause
The root cause for the above issues is because CKEditor adds a separate HTML element to the form for each field that is rich text enabled (and hides the original field). When you type into the rich text editor, it is this HTML element that you are editing, and not the actual field underneath. The OOTB validation and unsaved changes warning however, operate on the actual fields (and not the HTML elements that CKEditor injected onto the form). While CKEditor has built-in smart to automatically copy content from its injected HTML elements to the actual fields upon form submission (therefore enabling the content to be saved to CRM without any work on your behalf), the timing of this does not appear to be right for the aforementioned OOTB features to work correctly.
Solution
To solve this issue, we will use CKEditor’s autosave feature. This feature allows us to keep the content of the actual fields in sync with the injected HTML elements as the user types into the rich text editor. As this will be done continuously on a near-real-time basis, this will enable the aforementioned OOTB features to work correctly.
OK! Show me the steps (and the code)!
Acquire a build of CKEditor with the Autosave plugin
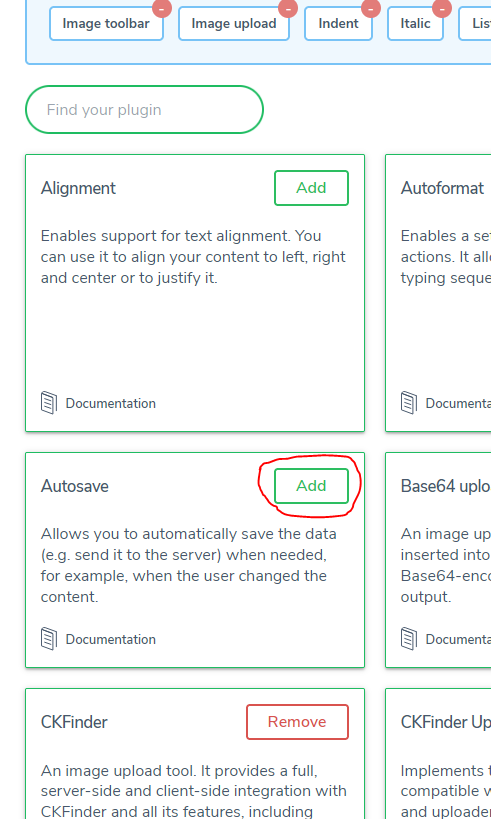
The autosave feature is not included in any of the CKEditor packages by default, so we will need to generate a custom build of CKEditor. Go to https://ckeditor.com/ckeditor-5/online-builder/ and choose your preferred editor style. When you get to the “Choose editor plugins” step, make sure you click Add on Autosave.
Progress to the step where you can build and download the generated package, which is a zip file. Grab the ckeditor.js file in the build folder of the zip. This is the file that we will need to reference on our web page.
Prepare Portal artifacts in CRM
I won’t go into details here as these are general Portal management step, but at a high level you will need to:
- Upload ckeditor.js as a web file to CRM
- Configure your basic form (aka entity form) or advanced form
- Configure your web page
- Test your web page
Add code to web page to implement rich text editor
Add the following to your web page’s HTML. Review the inline comment.
<!-- Add reference to our build of CKEditor -->
<script src="/ckeditor.js"></script>

<!-- By default the height of the rich text editor will be pretty small. This CSS will increase its height to 300px. You may
	want to move this to a global CSS file. -->
<style>
	.ck-editor__editable_inline {
		height: 300px;
	}
</style>

<script>
	/**
	 * This script initialises the rich text editor for the target field. You may want to move this code into the web page's JavaScript
	 * section, or to a dedicated JS web file.
	 * */
	$(document).ready(function () {
		/**
		 * It appears we need to specify the toolbar when using a custom build of CKEditor. See this post to learn how to discover all the
		 * component names that you can list on the toolbar: https://ckeditor.com/docs/ckeditor5/latest/api/module_core_editor_editorconfig-EditorConfig.html#member-toolbar
		 * */
		ClassicEditor.create(document.querySelector("#new_backgroundinformation"), {
			toolbar: ["heading", "|", "bold", "italic", "numberedList", "bulletedList", "|", "indent", "outdent"],
			autosave: {
				save(editor) {
					//This method must return a promise.
					var $deferred = $.Deferred();

					//Access the source field for the editor and copy content over to it.
					var sourceElementId = editor.sourceElement.id;
					$("#" + sourceElementId).val(editor.getData());

					//This is an OOTB Portal function and marks the field as dirty.
					setIsDirty(sourceElementId);

					//We have done all we need to do so mark the promise as resolved before returning it.
					$deferred.resolve();
					return $deferred.promise();
				}
			}
		});
	});
</script>
By the way, do a lot of PowerApps Portal coding? Check out my Visual Studio extension that allows you to seamlessly deploy Portal code from Visual Studio to CRM: https://marketplace.visualstudio.com/items?itemName=BernadoNguyen-Hoan.CRMQuickDeploy.
That’s it!
You should now have CKEditor integrated nicely into your Portal. You should also configure the OOTB rich text control in the CRM backend so that the rich text submitted from Portal will be displayed nicely to your CRM users.
But wait…
There is actually one more issue with CKEditor on the Portal. OOTB, you can click on a validation error message (highlighted in the screenshot below), and the page will scroll to the offending field and that field will receive the focus.
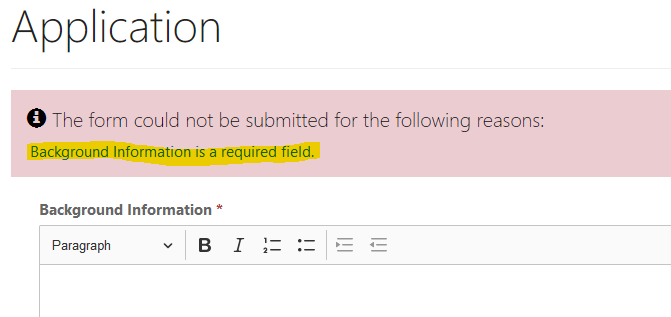
With CKEditor enabled, it still scrolls to the field, but the field no longer receives the focus. This is because the actual field is hidden by CKEditor. I don’t have a solution for this yet, but it appears to be a minor issue.

Nice post! Thanks! However, could not make it work for my portal form.
1. When uploading the ckeditor.js web file, should we indicate the web page file as the parent page for that resource?
2. What changes needs to be done for the basic form configuration?
3. Just to clarify. Do you copy the web template’s source field?
1. You don’t need to set the web page that is hosting the form as the parent page for the ckeditor.js web file. Any page can be set as the parent page for this web file. However, the parent page will determine the URL path to the ckeditor.js resource. You will need to reference this resource on your web page, so please make sure that you are referencing the correct URL.
2. No special basic form configurations are needed. However, you will need to invoke the CKEditor JS function (provided by ckeditor.js) to initialise the richtext field. You can do this either from the JS that you define on the basic form, or from the JS that you would put on the parent web page hosting the form.
3. Sorry, but I’m not sure what you mean here.. can you please clarify?
Hello , Have you also tried to implement Img adaptor for Richtext editor
No sorry, I have not :).
Also, just in case you are not aware, rich text editor on PowerApps Portal/Power Pages can now be enabled OOTB, which means the approach in this post should no longer be followed.